Form Logic Overview
Form logic rules are If-Then conditions that can be added to survey forms and note type forms to change the form in response to what the user enters in a field or combination of fields. The rule makes the form interactive during data entry and when reviewing saved forms. Form logic rules affect only the survey form or note form that they are created for.
This type of skip logic can be used to ensure that users see and are required to complete only the question fields that apply to them on a particular form. This allows for different versions of the same form for different people. For instance, an assessment might have additional questions for someone exiting a program that would not be applicable for new and continuing service recipients.
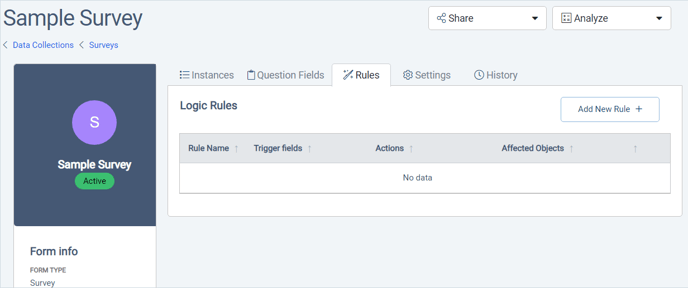
Rules
Rules are essentially "If this field has this entry, then do something." The action that is triggered by the field entry could be to show a section, hide a field, or show a message to the user. The IF part of a rule is the Condition, and the THEN part is the Action. You can have multiple conditions and multiple actions as part of the same rule.
Before creating rules, you must first create the fields and sections (groups of fields) that the rules will apply to. Unlike adding or removing fields, which only affect future survey instances, active rules apply to all survey instances. If you realize you would like to add additional fields, like a description field with special instructions, after a rule is created, you can add the field on the Question Fields tab and then edit the rule. However, keep in mind that new field(s) will not appear on any in progress or completed survey instances.
Conditions
The IF part of the rule is where you define the criteria for triggering the action(s). In other words, what needs to be entered in which field for the rule to apply. It is best for users if the condition fields come before the fields and sections affected by the rule actions.
Like with the filters for the All Participants search, the field type determines what comparison options are available. Number fields will have different options than text fields. File fields only let you choose between having an attachment and not having an attachment. Once you choose the field, the condition choices will populate. You can change the field and the condition values later if you need to.
Conditions can include more than one field. They can also check for more than one value in the same field. When multiple fields or field entries are included in an IF condition, you can choose how the conditions apply using by setting the relationship between them.
- AND: Both conditions must be met
- OR: Only one condition must be met
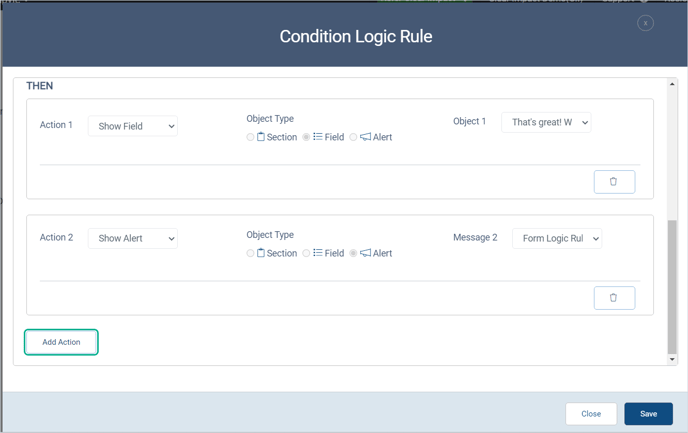
Actions
Actions are what happens when the the conditions for the rule are met. This is the THEN do this part of the rule. You can have multiple actions for the same rule, and all of the actions will happen when the rule conditions are met.
| Action | Result |
| Show Section |
Display the section. If the section is collapsed by default, the section will be collapsed when shown. tip: Hide + Expand in the section settings work best for conditionally showing a section. |
| Open Section |
Expands a section that is collapsed by default. Tip: If the section is hidden, Expand will not make it display. |
| Require All Fields in Section |
Make all of the fields in a section required. This should also make all of the fields in the section visible. Tip: Make sure the section will be visible before you require all of its fields. You can use multiple actions for this. |
| Hide Section |
Stop displaying the section. Note: This does not remove entries that may have already been entered in the section fields. |
| Close Section | Close a section that is expanded by default. |
| Make All Fields in Section Optional |
Remove the requirement for all fields in a section. Tip: If some fields are used by multiple rules, you may want to move those fields to a different section and apply rules to them at the field level. |
| Show Field |
Display a hidden field. Tip: This only applies to hidden fields and not archived fields. |
| Require Field |
Make a field required when the rule applies. Tip: Make sure the required field(s) will be visible if they are usually hidden. |
| Hide Field |
Stop showing a field when the rule is active. Tip: If there are multiple fields that will be shown or hidden conditionally, consider putting them into their own section. Then you can manage visibility at the section level. |
| Make Field Optional |
Remove the requirement to enter data for a field. Tip: The field will still be visible, and users can enter data in it although they will not have to do so. |
| Show Alert |
Display a message window on the form to communicate with the user when the rule takes effect. There are four built in alert types, which are managed in the Admin> Alert Templates tool.
|
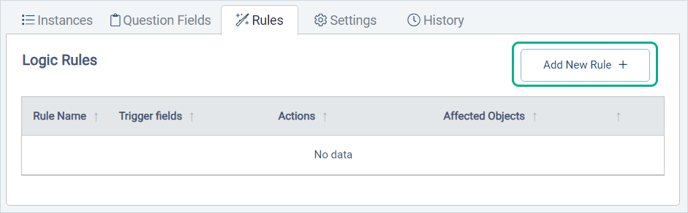
Creating a Rule
- Open the Form Management folder for the Survey or Note Type form.
- Select the Rules tab.
- Click the Add New Rule button
- When the Logic Rule window opens, enter a Rule Name
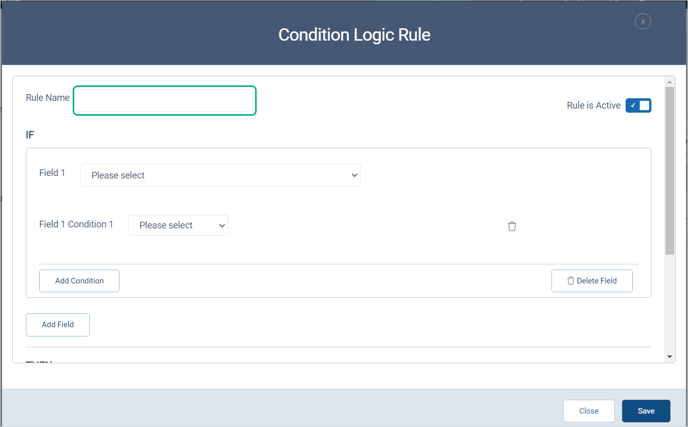
- Select a field in IF section, Field1 dropdown
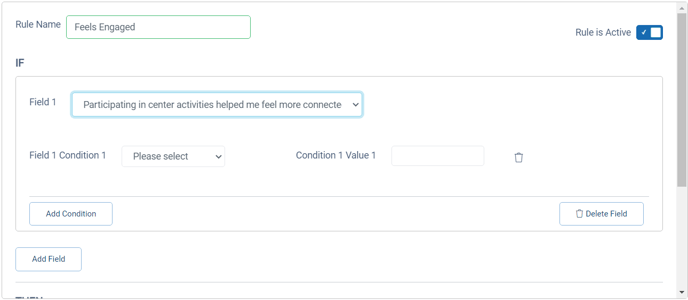
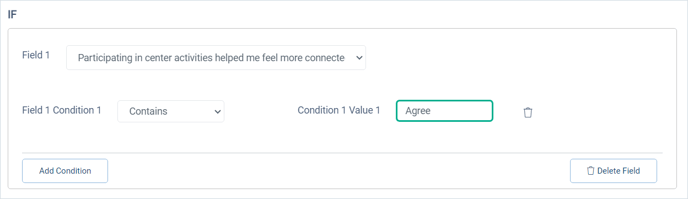
- Choose a comparison type in the Field1 Condition1 dropdown
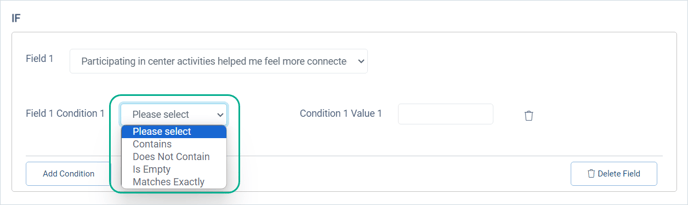
- Enter the trigger value in the Condition 1 Value 1 field.
- Optionally, use the Add Condition and Add Field buttons to include additional field-value conditions for the rule. Make sure to specify the relationship between conditions if you use multiples.
- AND: Both conditions must be met
- OR: Only one condition must be met
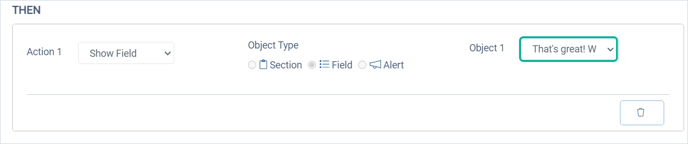
- Choose an action in the Action 1 dropdown
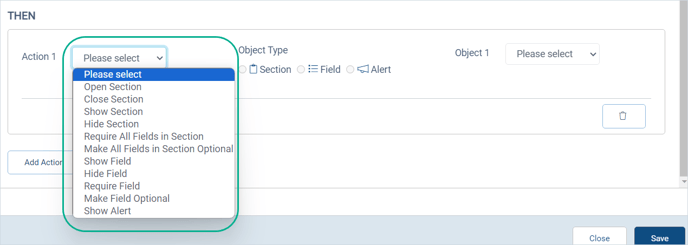
- The action chosen will automatically set the object type.
- Select the desired field, section, or alert for Object 1.
- Optionally, use the Add Action button to add more results for this rule.
- Save the rule.

- Test the rule to make sure it works as expected.
Editing Rules
Rules can be edited on the Rules tab in the Form Management folder.
- To edit a rule, click on the rule name in the list of rules.
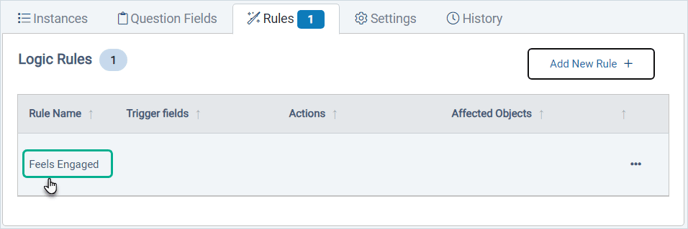
- Make changes and click the Save button.

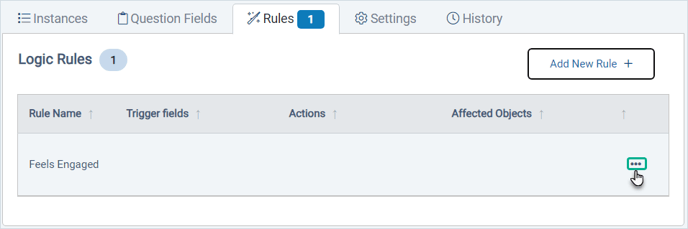
Copying Rules
Rules can be copied for the same form.
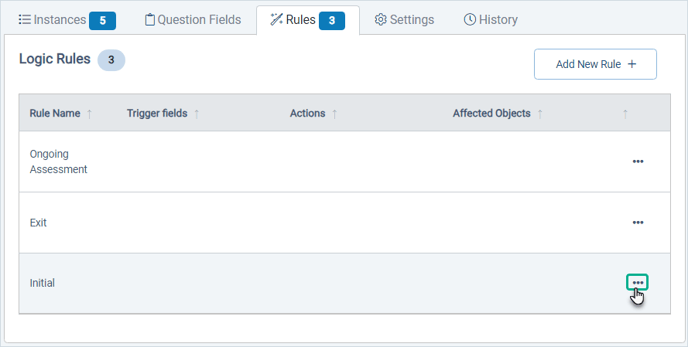
- On the Rules tab, hover over the ... menu for the rule you want to copy.
- Click the double page copy icon to copy the rule.
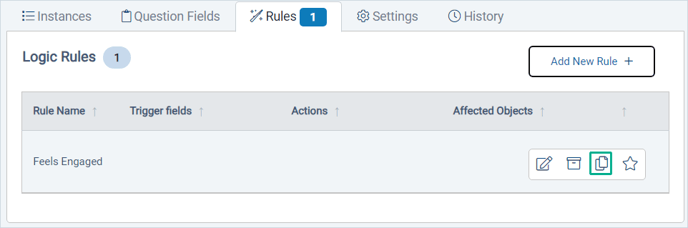
- When the Copy Rule window opens, edit the Rule Name.
- Change the conditions and actions as needed.
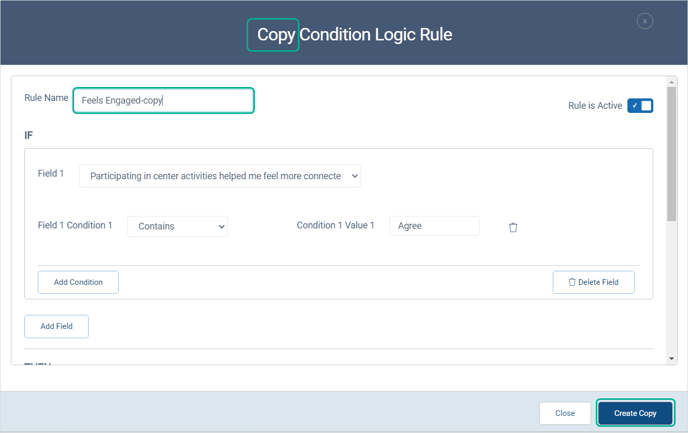
- Click the Create Copy button to finish.
Printing with Rules
The Share menu's Print Form option prints a blank version of the form without any rules applied. From the Rules tab, you can print blank versions of a survey form or note type form with a form logic rule applied.
- On the Rules tab, hover your mouse over the ... menu for the rule you want applied to the printout.
- Click the printer icon to print a blank form with the rule applied for participants.
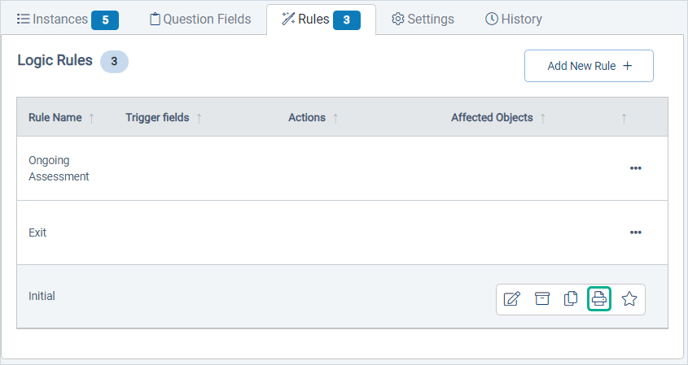
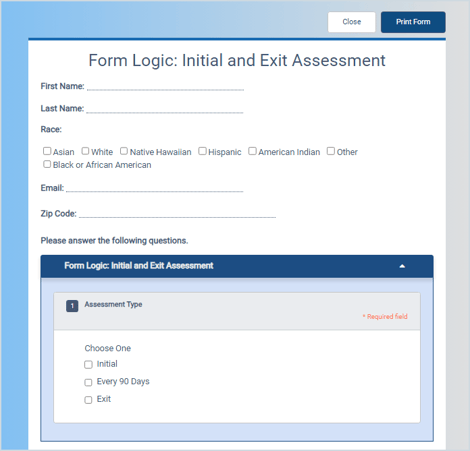
- The print form window will show all of the fields that will be displayed and required when the rule conditions are met, but all of the fields will be blank, including the trigger field(s) for the rule.
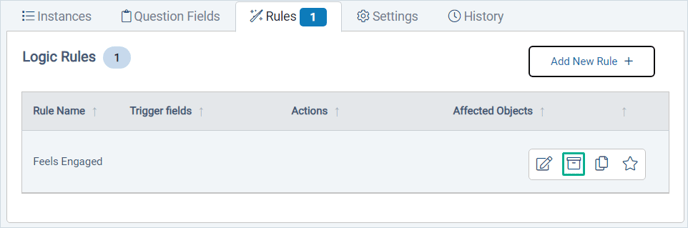
Archiving Rules
Rules can be archived but not deleted at this time. This so that you have a history of what rules may have applied in the past and to prevent accidental deletions.
- On the Rules tab, hover the mouse over the ... menu.

- Click the file box icon to archive the rule. This deactivates it so it no longer applies to any survey form or note form records.
How to Test Rules
Testing Rules - Quick Visual Check
- Open the Survey Form Management folder or Note Type Form Management Folder.
- Select the Rules tab
- Hover over the ... menu for a rule.
- Select the print icon to open a print preview with the rule applied.
- Check to make sure the correct fields and sections are visible/hidden and required/optional
- Notes: The If condition fields will be blank in the print preview. The alert messages will not display on the print preview.
Testing Rules for Survey Forms
- Open the Survey Form Management folder.
- From the Instances tab, create a new survey instance or open a pending one.
- Add a responder if there is not one.
- Start the survey instance.
- Fill out a response and try to trigger the rule(s).
Testing Rules for Note Type Forms
- Open a participant or organization folder
- Open the Notes tab.
- Click the Add Note button.
- Choose the Note in the dropdown form list.
- Enter data to trigger the rule(s).
Where Form Logic Rules Apply and Where They Don't Apply
- Form Logic Rules apply to the following
- Compyle system users entering survey responses.
- Compyle system users entering notes and reopening notes to edit them.
- Compyle system users editing survey responses and reopening survey responses for editing.
- External survey responders asking surveys/notes by link or QR code and completing/submitting surveys and notes.
- External responders using email reminder links to complete survey responses
- Form Logic does not apply in certain cases:
- Multi-Entry Forms, Printing Forms for Data Entry
- the Question/Fields tab, Survey Instance - View Questions
- Analytics, Scorecard Feeds, Calculations, View Report